Trimming your Husky’s nails is an essential aspect of their grooming routine. Long, overgrown nails can cause discomfort and pain, affect your dog’s ability to walk, and even lead to more severe issues such as joint problems. In this comprehensive guide, we will discuss the importance of trimming your Husky’s nails, the tools you need, and the step-by-step process to ensure a safe and comfortable experience for both you and your furry friend.
For Other Grooming Topics, see Husky Grooming >>

Why Nail Trimming is Important for Huskies
- Comfort: Long nails can cause discomfort for your Husky when walking, running, or playing. Overgrown nails can force your dog to walk on the sides of their paws, leading to soreness and potential injury.
- Health: Untrimmed nails can curl and grow into your dog’s paw pads, leading to pain, infection, and other serious health issues. Regular nail trimming can help prevent these problems and keep your Husky’s feet healthy.
- Noise Reduction: Long nails can create a clicking sound when your Husky walks on hard surfaces. This noise can be annoying and disturbing, especially for those who are sensitive to sounds.
- Damage Prevention: Overgrown nails can cause damage to your floors, furniture, and other belongings. Regular nail trimming can help minimize these damages.
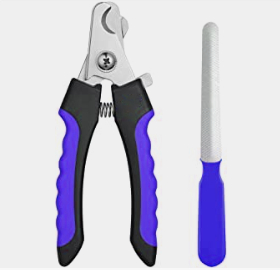
Tools Needed for Trimming Your Husky’s Nails
Nail Clippers: There are two main types of nail clippers: scissor-style and guillotine-style. Scissor-style-clippers are recommended for larger breeds like Huskies, as they provide more control and can easily cut through thicker nails.
Styptic Powder: In case you accidentally cut the quick (the sensitive, blood-rich area inside the nail), Styptic Powder can be used to stop the bleeding quickly.
Nail File: Filing your Husky’s nails after trimming can help smooth any rough edges and reduce the risk of snags or scratches. Here’s a link to some nail files for Huskies
Treats: Having treats on hand can help make the nail trimming process more enjoyable and rewarding for your Husky.
Step-by-Step Guide to Trimming Your Husky’s Nails
Step 1: Preparation
Start by creating a calm and comfortable environment for your Husky. Choose a quiet, well-lit space where your dog feels at ease. If your Husky is new to nail trimming or has had negative experiences in the past, take the time to familiarize them with the tools you’ll be using. Allow them to sniff and investigate the clippers and file before you begin.
Step 2: Handling Your Husky’s Paws
To help your Husky feel more comfortable during the nail trimming process, practice handling their paws before attempting to trim their nails. Gently massage your dog’s paws, paying close attention to their reactions. If they seem uncomfortable or pull away, give them a treat and continue to practice until they are more at ease.
Step 3: Identifying the Quick
The quick is the sensitive, blood-rich area within your dog’s nail. In dogs with lighter nails, the quick can usually be seen as a pinkish area within the nail. In dogs with darker nails, identifying the quick can be more challenging. One method is to look for a small, dark circle within the nail as you begin to trim. Cutting the quick can be painful and cause bleeding, so it’s essential to be cautious when trimming your Husky’s nails.
Step 4: Trimming the Nails
Hold your Husky’s paw firmly but gently, and use the scissor-style clippers to trim the nail at a 45-degree angle. Make sure to avoid cutting the quick. It’s better to trim smaller amounts more frequently than to risk cutting too much at once. If you’re unsure, start by cutting small slivers of the nail and gradually work your way closer to the quick.
Step 5: Filing the Nails
After trimming each nail, use the nail file to smooth any rough or jagged edges. This will help prevent your Husky’s nails from snagging on fabrics, scratching surfaces, or causing discomfort when walking.
Step 6: Reward Your Husky
Throughout the nail trimming process, provide your Husky with praise and treats to reinforce positive associations with the experience. This will make future nail trimming sessions more enjoyable and less stressful for both you and your dog.
Step 7: Monitor for Bleeding or Pain
If you accidentally cut the quick and your Husky’s nail begins to bleed, apply styptic powder to the affected area to stop the bleeding. Keep an eye on your dog for any signs of pain or discomfort after trimming their nails, such as limping or excessive licking of their paws. If you notice any issues, consult your veterinarian for advice.
Step 8: Establish a Nail Trimming Routine
Regular nail trimming is essential for maintaining your Husky’s overall health and comfort. Establishing a routine can help make the process more predictable and less stressful for both you and your dog. For most Huskies, nail trimming should be done every 3-4 weeks, depending on their activity level and the rate at which their nails grow.
For tips and links for brushing, see a guide to Husky brushes or for help specifically with the shedding process, see our guide on Husky deshedding

Summary
Trimming your Husky’s nails is a vital aspect of their grooming and overall well-being. By familiarizing yourself with the proper tools and techniques, you can ensure a safe and comfortable nail trimming experience for your dog. Regular nail maintenance not only prevents discomfort and health issues but also strengthens the bond between you and your Husky. Remember to be patient, take your time, and reward your furry friend throughout the process to create positive associations with nail trimming.
Related Topics:
Husky Grooming | Husky Shedding | Husky Brushes | Cleaning a Husky’s Ears | Walking a Husky | Husky Crate Training | Best Husky Crates
Related Image Galleries:
Siberian Husky Pictures | Husky Wallpaper | Husky Puppies | Husky Clipart
Other Siberian Husky Topics:
Siberian Husky Breed | Husky Personality